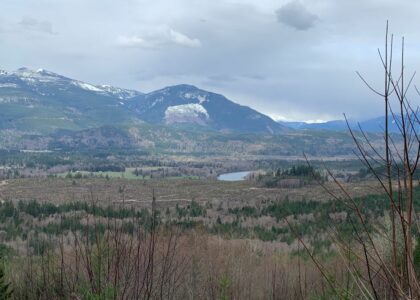
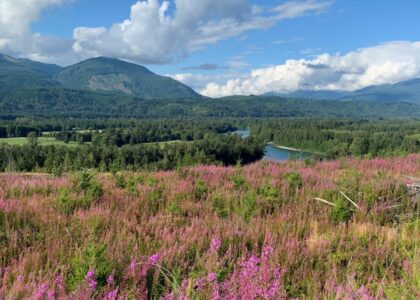
OK, so you’ve got a bit of background on how we got here. And, we ended up buying more land than we had ever thought we would. We were originally looking at 10-20 acre lots (and mostly those with an existing house) when we stumbled on this one. The good part of this – despite its size – is that we’re not going to convert all of it for residential use. Our real plan is to largely – just let the forest grow. We’ve been consulting our foresters and the forest is really healthy. What’s best now is to let things grow for another 5-10 years and then start strategically thinning some of the areas to allow the trees more room and for the most healthy to really thrive.
But, we’re not just going to let the entire forest grow for 10 years. That’s not the only plan. Overall, the final acreage came back at 223.29 acres. We’re planning to keep ~200 acres as forestland – never to be clear cut again! But, the other ~20, we definitely have plans. We will have our primary residence here (someday, soon’ish) and a barn (after we live there and can take care of the animals, etc.). Paul would love a stocked pond or two and I want lots of trails. Trails for walking. Trails for biking. Trails for ATVs or even off-roading bikes. However, I think my motorized-two-wheel days are probably over. I think I’d enjoy the comfort of an ATV more now.
And, while nothing is set in stone, here are our thoughts for our plan:
2021:
Really, we just want to get to know the land better. We’re camping A LOT. We’ve setup a pretty comfortable camp and Paul never wants to leave. And, we’ve setup a few bird feeders (and, we’ve already seen 21 species of birds – once I take a long lens / tripod up, I’ll be posting some bird shots for sure). As for Paul, I suspect he’ll come back home sometime in September or so. lol
But, this is also the year to get a better understanding of the process to build and to convert some land. We definitely know where the house will be built. It’s our favorite spot with our favorite views and the land structure is such that it will allow a nice daylight basement and a wonderful ground floor (remember, our retirement life is largely going to be on the main floor – main floor master, main floor kitchen, main floor laundry, main floor living room… the entry and the garage). But, we both like our space and we both love windows so we’ll have an upper level for guest bedrooms and decks, etc. and our offices / craft+hobby rooms on the lower level. One of my favorite things about our current house is our rooftop deck, I’m hoping to incorporate something similar into our retirement home!
So, in 2021 we’re also converting our first chunk of land – 3 acres – over to “residential.” I wanted to get a feel for this process and we definitely want to start using the land for some storage and ideally some “sleeping” structures (more on that soon).
Our land is “Designated Forest Land” (DFL) and is defined by this Washington State Department of Revenue Document: designatedforestland.pdf (wa.gov)
We have a full (91-page) Timber Management Plan. We have been (and will continue) to work with our fantastic foresters (Roots Forestry). And, we’re both learning more and more about (and enjoying!) forestry and forest management.
But, what happens when we want to use DFL for something other than forestry? We must apply for the “Removal of land from DFL” and this is definitely possible (that was part of our feasibility study before we purchased the land)! But, the bad news is that they – largely – want to encourage people to keep forestland as forestland! But, there are also different types of forestland – we mostly have SF-NRL land. SF-NRL is “Secondary Forestry – Natural Resources Land” and is land that is essentially the buffer between IF-NRL (Industrial Forestry – Natural Resources Land) and residential land. We do have a number of acres that are IF-NRL but they’re in the far back of the property where we don’t have any plans for conversion, which is good because IF land is even more challenging to convert (to be honest, I’ve heard that but I haven’t looked into it).
So, when you remove land from DFL (specifically SF-NRL), you are required to pay compensating tax for up to 9 years. So, the longer you wait to convert, the less compensating tax to pay. The good news is that the taxes are only assessed on the converted land – not the entire property. And, again, we are only converting a very small amount now (3 acres). But, doing so THIS year (since we just purchased the land) will require the largest compensating tax (the full 9 years). So, that process has been started.
For the Summer of 2021, we want to camp and setup our “base” so that we can go back / forth without having to bring all of our equipment (lawn mower, log splitter, etc.). To do this, we’re initially renting 20 foot shipping containers for storage. The reason these are ideal is that they do not require a permit if they are less than 200 square feet, do not have heat or plumbing and are not used for sleeping. You can see the Skagit County rules for buildings that are exempt from a Building Permit here. However, we are going to put a container in the 3 acre area that we’re converting and we’d like to add a second right next to it. The rules don’t generally allow more than one within a 5 acre parcel. So, these will need permits – along with the “sleeping” containers. But, the sleeping containers are definitely going to be a lot more challenging. I’m still working through the process to get to the point of being able to get a permit for these but I have quite a few to finish (the land conversion, lot certification, road access permits, critical area reviews, etc.). Then, I’ll start the official process to purchase the fabricated containers for sleeping. I already know what I want and the company I want to use: Conexwest! I’ve been going back/forth with one of their representatives and I’ve been really happy with their help!
There’s a lot more details necessary to explain this fully but our “first” big purchase / permit is ideally for just sleeping containers. We really don’t want to live up there yet (well, we do WANT to live up there NOW but it’s just not yet practical for us). Anyway, camping has been amazing. We’ve both enjoyed living mostly outside. I’m going to have to do a whole post about our “Camp” setup! The main point here is that showering in a privacy tent and using another privacy tent as out bathroom (with an RV toilet that needs dumping roughly once a week) has been more than fine. It’s worked out really well. The only major problem with camping is that I was *really* cold back at the end of April and early May when the nighttime temperatures were in the high 30s / low 40s. Even Paul (who almost never complains about being cold and who wore shorts in the arctic!) said it was “a bit cold for him” too. I’m fine with temperatures in the mid-50s. And, now with the heat wave (it was 116 at our camp!), I’m even debating on how necessary air conditioning might be for these sleeping containers. But, the nighttime temperatures haven’t been quite as bad. And, with good ventilation, I think that we can survive without aircon (for the sleeping containers). I think it’s going to become a necessity for the house though as I fear we’re only at the start of some crazy climate changes…sadly).
But, what we don’t want to do – is really anything permanent… yet. Really, we just want more comfortable camping (dare I say glamping?). Nope, I’m in my 50s – I can definitely say glamping!
My initial design for the sleeping containers is that they will be safe and warm.
No plumbing
Nope, they won’t have plumbing. We can easily bring in potable water (we have two 5-gal Igloo containers for drinking water and one with my super refreshing punch), four 5 gal BPA Free Water Bottles and we use a rechargeable water pump on one).

My Refreshing Punch:
OK, I love this. It’s lemon / orange / raspberry and it’s relatively light for a hot day AND I just add a bag of ice to it every couple of days so it gets a bit watered down over a few days so then I just add in a set of packets again. For each gallon, I use:
-
- 1 two-quart packet of Crystal Light Lemonade (note: this does have aspartame)
- 2 packets of Emergen-C Raspberry (this has sugar)
- 1 package of Orange Zipp-Fizz (this has caffeine from natural sources)
And for one 5-gal igloo, I usually make four, one-gallon mixes and then fill the igloo with lots of ice to the fill line!
NOTE: I tried a punch with fresh fruit (oranges and lemons – that I squeezed but tried to keep whole to reduce from splitting apart and clogging the spout). And, as expected, this went horribly wrong and clogged up the spout. And, I found that after a couple of days – even with ice added, I just didn’t like the “bad fruit” smell. I had to pour it out. My mix of mixes seems to do well just being “updated” with ice and an additional “one gallon mix” every few days. It’s holds up well and tastes great with rum (as you can see from my smiling face just about to relax after mowing the roads and cleaning up in my solar-heated-water shower)!
No septic
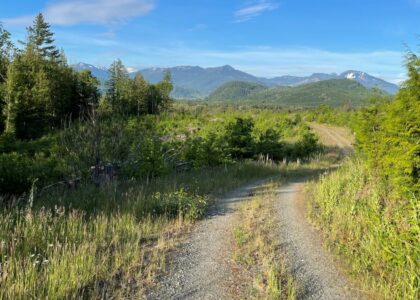
And no septic either. OK, there’s more to this. Initially, we want to place the sleeping containers where we later want to build the house (which is also where we currently camp – right at the old logging road turnabout that I show in the main photo above). But, since we’re not living there permanently, we don’t have a huge need. We’ve been camping and using these “RV-toilets” and I have to admit, they’re perfect.
The Shower / Potty Details
 OK, so many people have privately asked us… wait, if you don’t have plumbing… what about a bathroom? How do you deal with that? And, I know this is a huge issue for some people… To be honest, it doesn’t bother us much at all but – like most – we do like it to be private. But, we face our privacy tent toward the back hills and we never really close the tent doors – so, it’s private but with a view! This is an earlier (a bit less private location), I’ll have to get some new photos of our final setup. But, here’s what we learned!
One privacy tent for the toilet and once for the shower (and, for the shower, don’t scrimp on this IMO and always setup the guylines for the shower). We started with a less expensive one (mostly because I wasn’t sure how well it would work) and while it was SUPER easy to setup, it was small and didn’t hold up well in lots of wind. And, really, it was really a bit too short for us to stand up. We graduated to this privacy tent and while it was better than the first (for about the same price), I tripped one evening and completely destroyed this (we had arrived late, didn’t have all of our solar lights setup, and well, I was tired too… and, there may have been rum). Now, I realize that I tripped but the damage this thing sustained with only one fall seemed a bit extreme. This one ripped really easily. We kept all of the poles but I didn’t feel the tent was worth saving. And, there’s NO WAY a large shower bag would be held up in there. So, I went for it and bought one of these privacy tents. This thing is great. But, it’s still not super tall for a shower bag and a large person (the advert must feature a woman that’s 4 feet tall ;-)). So, I ended up getting a bench for the shower. And, I didn’t really like the bathroom floor getting all wet from showers so I ended up separating the shower tent from the bathroom tent. Sadly, the Vidalito tents were not available and instead I went with one of these privacy tents. This thing is massive. And tall. But, you definitely need the guylines setup if you’re going to use a shower bag (and I didn’t have to with the Vidalito). But, once it’s completely setup, it’s actually pretty cool. I love the Lightspeed’s design for the shower floor – it has part mesh / part solid so water can drain. And, it can be clipped / unclipped for drying, etc. So, I think I’d go straight for one of these if you’re setting up an extended stay camp! And, get rid of almost every tent’s default stakes, those crappy L-pieces of metal are terrible. I wish you could just not even get them. We’ve ordered a bunch of these TWISTED metal tent pegs and never looked back. We use a rubber mallet to install them (I bent that hook on the end of mallet on our first trip so you might opt for a hook-less mallet) and then a giant pair of pliers to remove them. We’ve switched all of our tents to this combo and after we set things up (guylines included), nothing moves even with our sometimes-windy camp!
As for one other thing we’ve learned… emptying the RV toilet is not for the faint-hearted. But, we all own lots of masks now so here’s another use for them! And, if you don’t go for that recommended toilet above, be sure to get one with a pour spout. I cannot imagine not having one (and chose this particular toilet after reading some of the reviews for ones without a pour spout… yikes!). Anyway, what did we learn – get something to help break down the contents. We use these holding tank drop-ins. And, we don’t put any toilet paper in the portable toilet (we did ONCE and we learned that things just don’t break down quickly enough and emptying the tank is not pleasant). Anyway, I setup a cute tissue holder (with a rock in the bottom to stabilize it in the wind) and a simple garbage for tissue, etc. And, as much as I love my friends, this is just a private setup for the two of us. When we have camping guests, we’re planning to setup a privacy tent with the same setup we used at the very beginning: portable toilet seat and compostable bags. Folks can take out one bag of garbage at the end of their stay and dispose. With the bags, there’s no smell or anything, it’s really more than reasonable. We just chose to use the RV-toilet setup for longer-term use (and, it is a lot more comfortable and convenient than the bags). And, we plan to use the RV-toilet setup for the in the containers as well.
Finally, that sink setup you see sitting outside – that’s fantastic. We have the Hike Crew Portable Sink with foot pump. We use only natural gel soap (I love Puracy!) so a little that hits the ground won’t be a problem.
So, there’s all of that “fun stuff” but in the end, what we’ve really learned is that it’s simple and more than reasonable – for the foreseeable future. We’ve really enjoyed just sitting around the campfire and enjoying nature (especially the birds – they’ve been fantastic, the common nighthawks chirping around while we’re at the bonfire is spectacular!).
So, our “two-year” plan is to camp. But, in more comfort. And, part of why we’re going with containers is that they’re secure, easily moved, and there are some incredible fabricators out there doing amazing things with them.
So, what’s our “sleeping container” setup…
Our Sleeping Container Setup – v1
Remember, these are going to be placed in a temporary location and later moved. So, I’d rather not have to do anything permanent (a well / septic / plumbing) until they’re moved into their final / permanent spot (roughly 2023). So, I’m only going with windows (for ventilation and safety), electrical (with a solar setup), and a direct-vent (rear) propane fireplace. The fabricator (Conexwest) will do most of this except the fireplace which we’ll have done by a local contactor/installer. The container will be setup with French doors that open out but they will be within the container doors so we can securely close up the container when we’re not there. The windows are going to be 4×4 windows with “barn door security” on the exterior. The idea is that we’ll set these up with a bed, some storage, the portable RV-toilet, and then we’ll bring our own potable water. In the winter, we’re not likely to spend more than a couple of days at a time so we should be OK without a shower for these short stays. And, while it might sound strange, I’m planning to order two of these. Paul snores and I move about like a monkey (lol). We can each retreat into our own space for sleep but spend the evening hanging out in one of the containers. I may even consider a TV above the fireplace once we have Starlink setup and they will have a nice dual-recliner setup for relaxing! For even better ventilation as well as when we’re not there, we’ll have a louvered vent and a solar turbine vent.
However, the most important reason for two 24 foot containers is that these will (in a couple of years) be the two bedrooms for a small cabin/house that we’ll live in while we build our house and later as a guest house. By, taking our time to set this all up AND by using containers, we’re getting the most out of the land the most quickly and the total cost of the guest house will be lower than a more traditional house. Additionally, we have those benefits of being able to use them right away (this year) and then move them easily into the guest house position! I’m really hoping that the county can see the beauty in this as well. Fingers crossed that the permits will work / be approved.

2022:
Continuing on like 2021. Hopefully, we’ll have plenty of storage options and two sleeping containers setup. Mostly, we just want to continue creating paths, add a secondary road to where the house will be (we like redundancy), determine where we want to put accessory buildings (like a barn) and just take some time to really enjoy the recreational side of the land (I really want NEED an ATV 🙂 ). We have some waterfront on the Skagit River so we also hope to enjoy that a bit. However, the Skagit River runs quite quickly where we are though so it’s more for relaxing than swimming. But, when the river isn’t so high, it will also be a great place for Paul to fish!
2023:
We’d like to convert some more land for the eventual “guest house” which will include moving the two sleeping containers into their final position where we will also add two more containers as the main / central living space. I promise I’ll show you the plans for this as we start to move forward but I need to get past the initial permits to even know if we can go this route. So, this is a HOPE but not a guarantee at this point. When we add the main living space containers we’ll also add plumbing – this means our well and a septic field. As part of our feasibility study, we did work with a certified well designer / digger to confirm that a well would be possible. And, we also consulting a certified septic designer on the possibility of a septic system. This is an absolute must if you’re looking at vacant land. To be honest, there’s a long story to the “water rights” in Skagit County but the issues are starting to be reduced and hopefully we’ll be able to get a water / well permit without much trouble. Both should not present any problems – but, we still need to apply for permits for these first. And, everything takes time. To be honest, if you’re even thinking about vacant land, I’d recommend that you do so without any rush. Take your time and don’t be in a hurry – permits, the entire process, etc. – it’s lengthy. Hopefully, also in 2023, we will start the process for our main house.
2024:
Ideally, we’ll sell our home in Redmond, move into this small “container home” and start the process to build our forever home.
2025-2026:
By 2026, we hope to be moving into our forever / retirement home!
Thanks for reading!
-k


